Search This Blog

Wednesday, April 24, 2019

Another up and coming project... Norman SAGA Age of Vikings 4 pt war band

Just an update... of another up and coming project. I will be starting on my SAGA Age of Vikings Norman war band. As I have mentioned elsewhere, the quality of these castings was a lot better than my Milite Christie SAGA Crusades war band. 


 This time around,  I opted to also buy the faction hero and the standard bearer. I really like the Normans, not only because of their history, but for their appearance/armor, etc..... it also makes them a quick work when painting them up.


As I said, I was a lot more pleased with the castings. The biggest issues this time around was the underside of the horses and a little flashing on the troops. There were no misaligned casts that needed any work AND, most importantly.... the feet of the mounted troops were cast correctly and readily identifiable as feet!


The Norman flag looks great! The figure was clean and will go together easily!


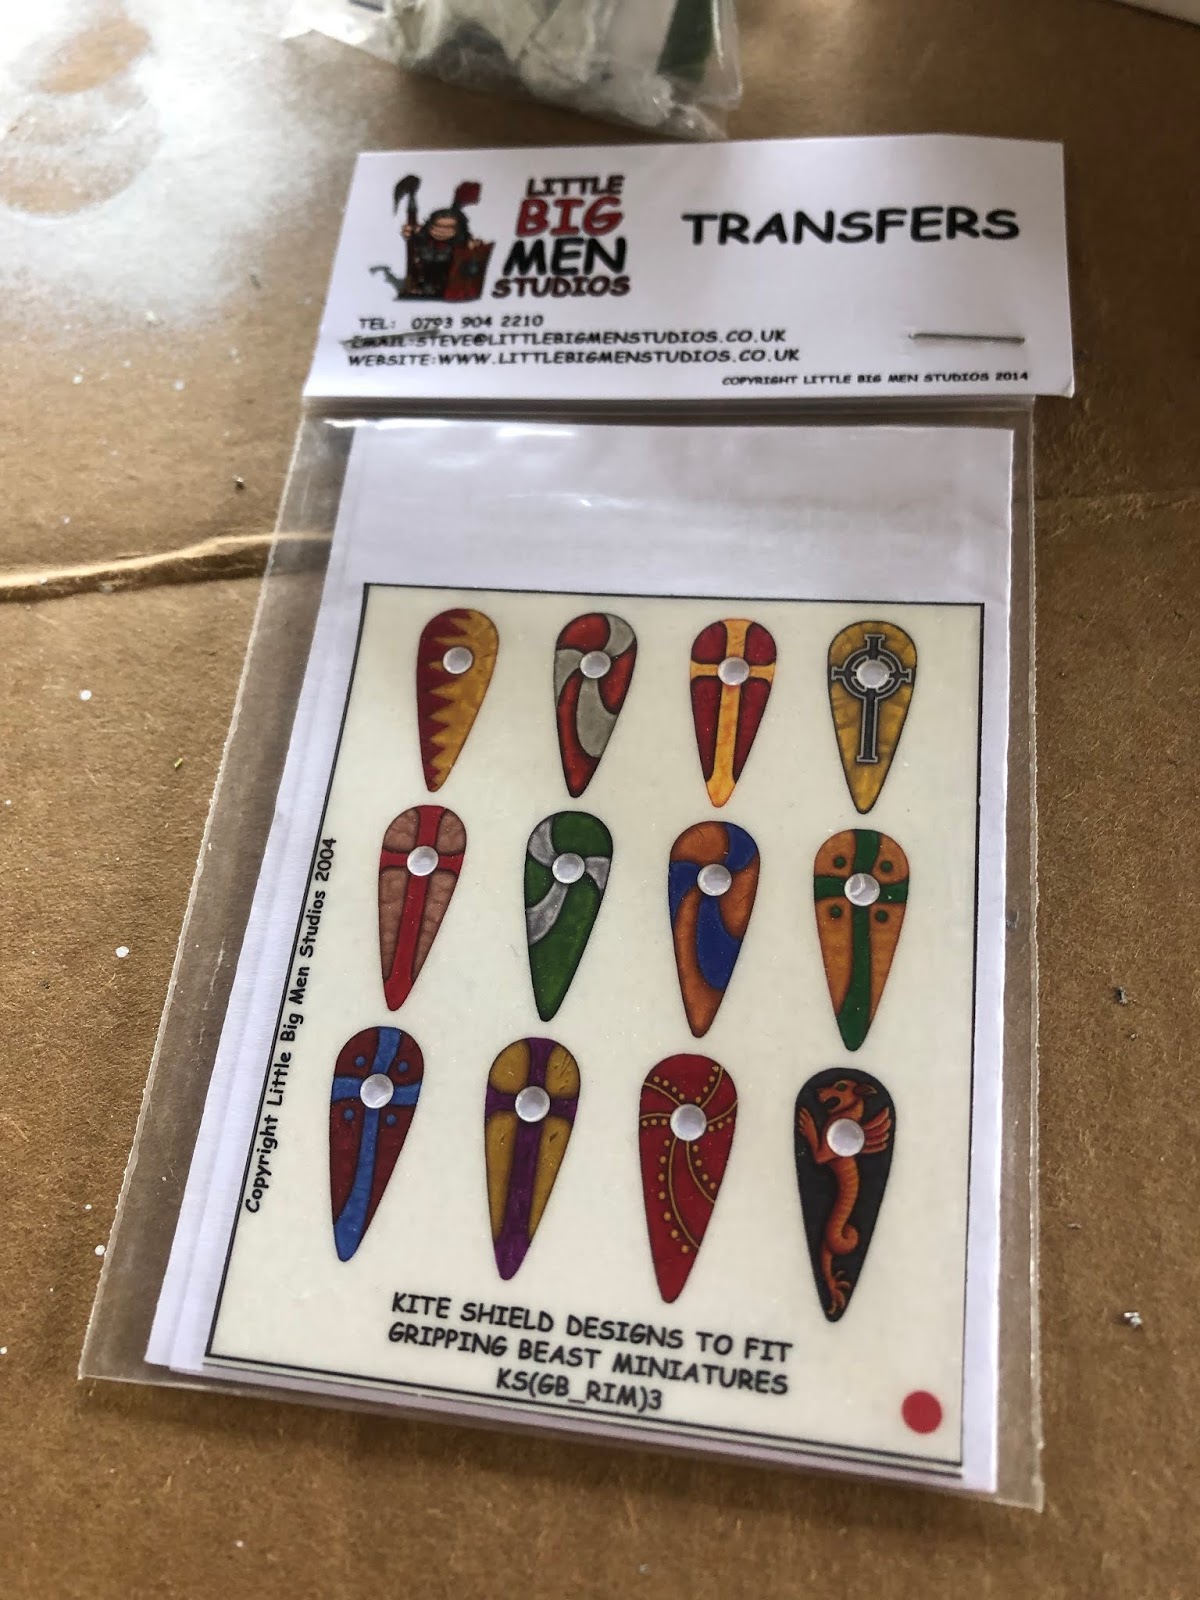
The decals were bought and again, only later did I realize I would be adding more foot troops.. which have shields... they will need decals too!!! I'll pick more up at the next HMGS show. I really like the look of the Little Big Men studios decals.... most importantly, they FIT well on the figures. The punched hole makes them great for alignment too!


The 4pt army commander, the spears for the Hearth guard,  crossbows and bows for the foot troops. All were cast well and there were no issues with cleaning them up.


The horses had the biggest issues. I loved that they came in different styles, all historically correct, but not all uniform in tack and harness. They cleaned up nicely, but it took some work. I tried to go the extra mile on all of the figure prep because of the later issues I experienced with the Milite Christie. I have to say.... there was a lot less prep work to get them ready to prime. And, if all goes well, this will be a short work, once I actually get to them.

The last thing I wanted to mention was closing the loop on an earlier statement. I need more shield decals because I plan on picking up 2 more points for this war band. I will be picking up a unit of spearmen in padded armor and either a unit of mounted or dismounted knights.... all will be figures from Crusader Miniatures... I absolutely love their casts for what I want to get. The only issue here is that as much as I love the dismounted knights... and as historic as they are, the SAGA Norman Battle board has most of the knight abilities based upon mounted figures. So... no matter how historical the foot knights are... in the game, I do not think they will perform well. I will most likely have to go with mounted knights with swords.


Tuesday, April 16, 2019

SAGA Age of Crusades Milite Christie Templar Warband... completed!

OK, so at long last, My SAGA Milite Christie... Templars are complete! Now to get some games in!


First up, I wanted to do an overall review.... from box to board. Starting with the price, I find the SAGA starters on par with the rest of the games now a days. Still too expensive for what you are actually getting, but priced at what the market will bare. The only disappointing thing about this set is the amount of prep work that had to go into it. The castings were just bad....  by this, I mean not quite full molds, air pockets and misaligned molds.... this was the hardest part. When you get figures from a misaligned mold, they are very hard to fix. I did what I could and moved on... It was an ongoing process too. Even though I used magnifiers to paint, I didn't for the prep work and found myself going back to strip paint off and shave off some lead.... Especially when it was time to mount the figures.... At one point I had them all aligned. Somewhere along the line I got them mixed up. I STRONGLY advise that whenever you work with mounted figures, you figure out which guy will go on which horse and match them up for best fit! THEN MARK THEM! So when they get separated.. and they will... You will be able to match them back up again later.

Now, I want to say.... I probably should have returned them and gotten a different box, so that is on me. I also want to state that I also have the Norman box set and they are beautiful! There were hardly any mold lines and they cleaned up very easily. I think my Millite box was a fluke as I have seen many other SAGA sets by Gripping beast and they were pretty nice, right out of the box, so lesson learned!


 So, here they are, each group... Up first, the foot warriors. The color pallet for these figures was really easy.. white, black, brown, steel and flesh. Each had their own highlights and shading colors too. The bases were a mix of GW tan & brown colors with some Army painter grass tufts added in. The shields were all done with the decals they sell to go with the figures. A very nice decal, simple to use and they give the figures a very nice finish.


From the side. I really liked painting this group the most. They were actually really clean compared to the knights and horses.


Nest up, the archers. They took some time to get through as I just wasn't motivated to get through them... they just didn't have the feel of what I expected in the Templar order. They might get replaced with Norman crossbow men in padded armor....  to give them a more military look. The colors I used were all flats, even the red. Colors were not a big thing during this time in history and anything extravagant was expensive, so you would see simple colors... but mostly raw muslin colors, tans, browns and some grey.


My Warlord. I want to add the Templar cross on his cape.. I can still go back and do that. He was a simple paint job. His colors were the same as the hearthguard except he was mostly covered by his cape, so a lot of black... that is why I chose a lighter colored horse.The only thing I think I did a little different than the intended piece is that from the looks of the model, he had the top of his head shaved like a monk. I didn't like that and painted over the "shaved" spot and tried to add in some detail so it wasn't just smooth...


The mounted knight/hearthguard with hand weapons. I really liked how some of them had empty hands so you could mix up the weapons a bit... this is where the real troubles began... I found a few areas I missed during initial figure prep and that got me angry. Then it went down hill from there. I notice one of the horses was missing the lower part of one of the front legs, while others were just really bad casts. The colors for the warriors were the same as the ones on foot. I tried to distinguish them by using different horse colors. Again, I tried to stick with common colors for the era. They are plainly painted with only a little dry brushing. One thing I actually really liked about the horses... they were different... and by that, I don't mean the poses, I mean the reins, tack and harness... they were sculpted with a variety of different kinds. This made painting them a little more fun and really interesting to see the different styles they were sculpted in.


The hearthguard with spears... these guys painted up fairly easily, but again, the worst part was the misaligned molds, especially at the feet... the molding was bad. You couldn't really see a clear shape with the feet. I had to cut, snip and file and do what I could to get them to look right. In the end, most folks will never look that closely at the underside of their feet, but.. I know what issues were there to overcome... again, these figures were NOTHING like the Norman box set I picked up.. those guys had very little prep work to get ready for priming. More on that when I start that project.


And finally here they are in all of their glory! I still love them, they are my own.... I won't be winning any prizes for their paint job, even the ones that are really nice, still have some visible mold issues in places when critiqued. I think I want to add a hero and possibly a Templar mounted and foot standard....


In the end, a lot of lessons were learned. I do like how they turned out as a whole, but I am biased.  I might go back and ink the rest of them, but they are, as of now... complete and table top ready.. matt varnished and good to go. Now I just need a storage container for them! I cannot wait to get into the Normans! I have a lot of plans there and am looking forward to painting them!

Most likely though.. I will be back to some LOTR miniatures.... I'll work on the Normans in between the other ones.


Monday, April 8, 2019

SAGA Decal Review


OK, as my Milite Christi warband for SAGA gets nearer completion, it is time to add the decals... I honestly struggled with this for a variety of reasons... First and foremost... I have never used this type of decal before and I was unsure of it. Now is also a good time to rehash my only complaint with the SAGA decals.... Yes, they are made by a 3rd party for SAGA.... but, as I have said before... why are they made with 12 per sheet and not 16? I admit, my limited exposure to the game is that you need 16, NOT 12.... but I might be incorrect somewhere. Anyway, I had to buy a second pack of the decals to get enough to do up my whole SAGA Milit Christi warband. There were 8 mounted knights and 8 warriors on foot who would need them.


Like I said, I was a little apprehensive as I have never used this kind of decal before... I read and reread the instructions. It seemed simple enough. The first part was making sire the area of the decal was painted white. This was because the way the decals were made, white was not a color on the decal. To print white on a decal is expensive. The work around is to print the decal on clear decal paper and then make sure the area beneath is painted white. It worked well. I'll have more information on this later as I have picked up a decal making kit from Testors. That will get it's own review and blog spot.

The hardest part was the second part... cutting out the decal. I opted to use an Xacto knife as the decals are small and I am terrible with scissors... mostly because I am left handed and do not own any left handed scissors. Even then I suck with them. It is a grade school lesson I never learned well.


To cut out the decal I ever so carefully cut through the plastic covering and into the paper beneath, I then flipped the sheet over and cut through the already existing line created from the first soft cut. I found that this worked well. Beneath the plastic cover is a sticky side that attaches directly to the figure. The decal print goes through and once the backing is removed, you get the reversed side of the decal showing.


It looks rugged, but it was a smoother cut than it appears.

 
 Once it is cut out, you peel off the plastic and then apply the decal face down on the model. The sticky side adheres to the area you want to  stick it. It is a little forgiving as I was able to re-align the decal once or twice while centering it up. It still stuck just fine.


Once you align it, you then apply water to the paper backing, not a lot, just enough to soak it through. If you add too much, you can dab it off with paper towel or q-tip. One great thing about the decals... the shield boss was already pre-punched out... this really helped in aligning the decal correctly. It was a great feature and I am glad they did it.


Once it is applied and wetted, dab off the excess water and then peel off the white backing. At this point I was skeptical... but the final product really looked nice. Being that it is a decal, it has a somewhat glossy finish to it. I will take the leap of faith and believe that when I spray the whole model with matt varnish, it will look correct.


The next step is to go around and touch up the decal edges, etc... When I prepped the figure I saw that the white really only needed to be in certain edges or where the white would need to show through from beneath. Because of this, my touching up wasn't all that bad. I had to touch up some of the brown around the shield edge and only a little black where some white still showed around the edges. The decals took paint easily. In the end, they look great so far, but I really need to varnish them to see the final effect. 


I think it looks fine. You cannot see the shine from the decal in any of pics, but it is there. I have high hopes it will "wash-out" when the matt varnish is added.


I did find one thing, I was being too conservative when I was cutting them out. The decals are sized very nicely to fit in the space provided, especially because they were made specifically to fit the SAGA models. So, when I cut them out I stayed as close to the edge of the decal as possible... I had to use the back end of a paint brush to better "form-fit" the decal on one of the models. It worked well and the decals stayed in place. They were easy touch up and in the end, very easy to use. I highly recommend them as they are very inexpensive and if you cannot paint the small details or straight enough lines, decals make the work a lot easier. Definitely worth the money in my mind. It makes the models look a lot more professional and the shields are the largest thing on the individual models and it draws the eyes... the better the shield looks, the better your overall model will look.

I'll post a review of the whole army box when I get all of the decals done. Unfortunately, I took very few pictures when I was actually painting the mounted figures up.

So, final decision.... I am very glad I bought the decals and even happier that I bought them for my Norman army box set for SAGA. It will make the models "pop" more and have a positive effect on their appearance. I am glad I went this route instead of trying to freehand all of those crosses!  


Friday, March 29, 2019

Counting down.. 6 more to go..... LOTR SBG Dwarves

Another quick update as I am still making headway and while I still have some momentum! I finished Durin and Mardin for the LOTR Strategy Battle Game last night and again, I am very happy with them... I opted to copy some GW images for paint schemes as I really liked them. I continued with my Games Workshop Dark Angels green as the main color focus... otherwise, I tried to duplicate what the artist did for GW... imitation is the biggest compliment yes?

This time around, since I was dealing with major heroes, I opted to actually use a shiny gold color from Iron Wind Metals over the bronze from IWM... I think it really made the armor pop... especially the details. I didn't write down the exact GW colors.. I used to know them all and they are always changing!.... 

I painted Mardin first... I used GW chaos black, highlighted by IWM light grey for his gloves, belt, pouch, armor padding, beard and eye patch. Dark Angels green for the fabric, highlighted slightly another slightly lighter GW green. IWM steel for the trident and IWM bronze and gold for the armor. His flesh was a mix/blend of IWM flesh.... 2 different containers... supposedly the same color, but years apart in manufacture.. they were clearly different... I used the older, darker one for the base and then the lighter to highlight. The base was done in small gravel painted Eshin grey and highlighted again with the IWM lighter grey. The figure was then washed in Nuln oil and then touched up with color highlights where the ink didn't set right.

Durin was up next and for him I used basically the same colors and the same process. The gold really made him stand out from the rest of my dwarves that are painted in bronze. I layered the lighter GW green over the dark angels green on the leather for his axe handle. For his cloak, I really liked the GW painted model and went with it.. or at least I tried to! I used a scorched brown and a dry brush of what I would have called snakebite leather, but it wasn't it was a shade darker. The effect worked and I am very happy with this duo. 


 The king and his guard, ready for battle after all of these long years of storage!  


 Close up of front and back of the dwarven heroes!!!


Up next... I have decided to take the easier road than the desired road... As much as I want to get my Haradrim or Riders of Rohan done, I am opting to close out my easier paint jobs. I have 8 plastic goblins for my Moria army to go.. at least until Games Workshop releases new models! That will close out my Goblins for a long while I hope.... after that? Most likely my Corsairs of Umbar... I have 3 models left to paint there, the lead heroes... I have the box set of 24 and then the 3 metal characters... I do not have any of the arbalests... but, the box of 24 has regular archers. Beyond that.. well, I haven't thought that far ahead. I have so many other projects.. SAGA, ACW naval, WW1 1/144th planes, FoW, 15mm Napoleonics.. the list goes ever on and on....


Monday, March 25, 2019

Final Dwarf Lord of the Rings Skirmish battle game countdown!!

Well, the time has finally come! I am down to less than a dozen LOTR dwarves left to paint!!! (of course, this doesn't include my Hobbit stuff). Anyway, I finished up the last of my warrior archers and then moved on to the remaining Dwarf rangers.


I used my same color pallet for them, The blue of the blue mountains. I wanted my force to be original... only later to realize that I would need them to be compatible with Durin & Mardin too! Ahhh well, I handled that by using a dark green for the others.. more on that later! The figures were painted with mostly IWM paints.... blue, bronze, steel, leather... Some highlights and the bases were done in Games Workshop Eshin grey and a light IWM grey. The gravel varied between fine and small depending upon what type of figure I was painting. I tend to do the heroes in a finer, smaller gravel.


  The remaining Dwarf rangers were up next. I had 4 with axes and 4 with bows. I used the same color scheme, except I did a few in the dark green... it was a GW Catachan green or Dark Angels green.... the names change so much....


 They finished up nicely! I believe these images are "pre-inking". I am still struggling to learn how to better use the Nuln OIl and ink washes.... I am really liking how they look once inked. I have also gone back to hit highlights on the figures where the ink stained or highlighted areas that shouldn't have been darker... like foreheads, etc...


Queued up was a command group with a hero/captain and standard bearer. As I had already started on making some figures in green, I opted ot make the captain and standard green also... I already have 2 sets of them in blue.


The finished rangers with axes... I did the cloaks in a lighter grey to see how it would look. There is actually 2 shades of grey, but the contrast is not visible in these images.


The completed archers.... same story, some green, all with the lighter cloaks. I also experimented with rad hair and lighter highlights. I like the way it looks, I just need to get better at painting it. I started with a base of ITW red-brown and then used a GW dark red... not crimson gore though.... just a darker red I had. I dry-brushed this over the re-brown and I like how it turned out... I might need to go back and hit the highlights again as the ink left some darker spots in raised areas.


Skipping ahead... I didn't really take any "in process' pictures of the captain and standard bearer. They were both done in green.. I am happy how they turned out... a bit better than table top, but far form collectors... from a distance, they look great... I am slowly getting better at looking great at "up close and personal".


 Here they are a little closer... it is pretty neat how small they look when my hands are in the pictures! I should have taken better pictures of the hero and captain... perhaps soon enough...


In this image you cannot see the shading on the standard...it is a dark green with the dark red and a lighter green for the raven and then some highlights.


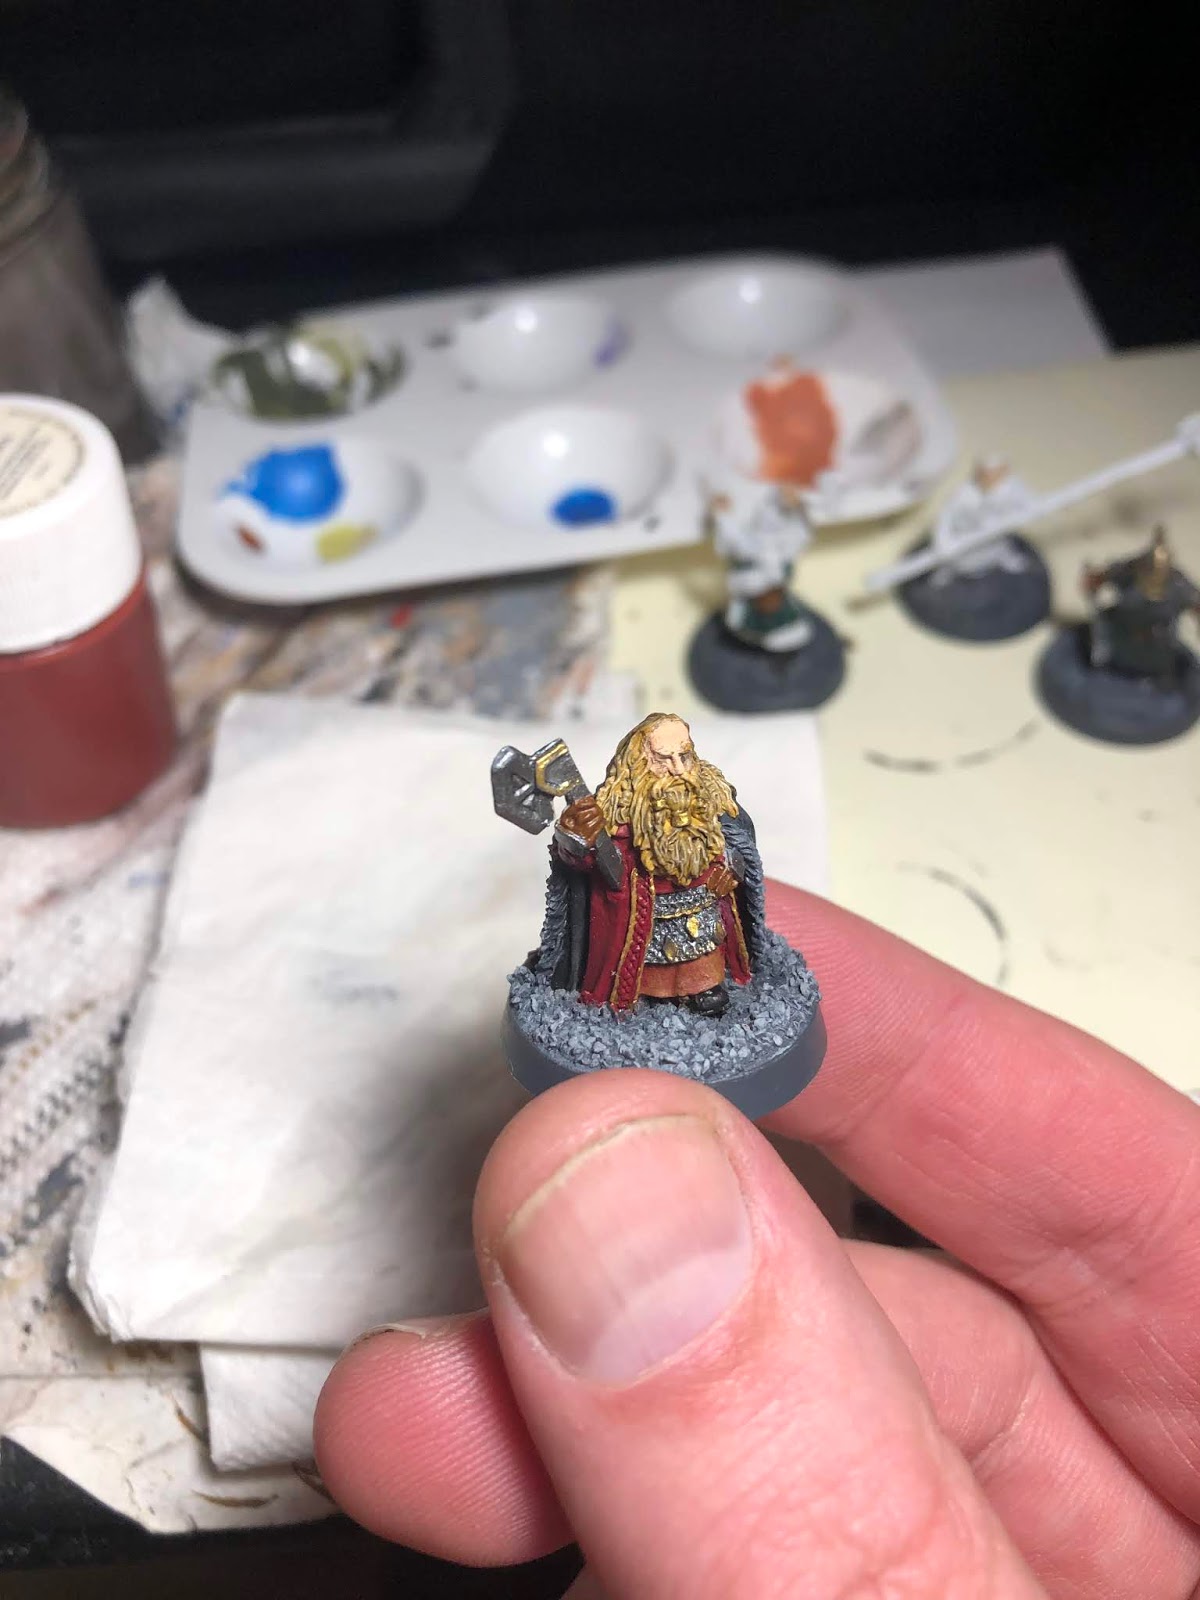
And now for something I am pretty proud of... I decided to knock out one of the dwarven king figures too.... I wanted it to be different from all of the rest, so I went online and looked at a lot of images.... I opted to go with a variant on one of the Games Workshop paint jobs. I really like the way this one turned out! I experimented with the hair and highlighting, more inking, fine line embroidery.... it all seemed to come together pretty well.... again, I am no pro, but this one turned out nice!.. Still no eyes... I used ink to give depth and detail.... thin your paints!!!! If you base paint thin enough, you don't lose details the ink can pick out.


 Below is one of the Iron Guard I did also... I actually painted 2... ? Not sure why I only took pics of the one. I did them in the dark green too....

 
Next up I am working on Durin and Mardin. You can see them in the background of the above pictures. After them... well, I can say I have 2 more Iron Guard to paint, one dwarf king and another captain.... then, dare I say it.. I am done.... Until GW releases their new supplement and new figures to go with it..... <sigh>...... 

After these are done, I have 8 measly Moria plastic goblins to do. I want to take a break and finish up my Milite Christie warband for SAGA as I picked up the rest of the shield decals I needed to finish them. I still need to finish the horses and the riders. I picked up the Age of Viking book with the battle boards for the latest edition.... so I can move on to painting my Normans next!

So many projects! I am so glad I am getting a lot done.