Search This Blog

Monday, May 14, 2018

LOTR Mumakil.... Round 1

So, I never know where I am going in the hobby until I get there.... This time I changed plans from working on my SAGA Militias Christi war band so I can knock out and finish my two Mumakil for LOTR Strategy Battles.


Both models were bought used, both needed a lot of love, one was missing pieces. I saw them as an awesome opportunity for a great price. The first thing I had to do was to decide upon a standard color scheme. The Mumak in armor originally had the howdah painted slate grey as I showed in my last post. I knew that I wanted them both to "match", so I struggled with this and opted for them both to have the scarlet/red howdah's like in the movies. That was fine as I had to rework both of them to some degree anyway. The repaint would give me the opportunity to shade the lumber, etc.... without having to worry about getting paint on the howdah fabric as it would be repainted. 


I started work on the armored one as I really love the customization the original owner did. I couldn't wait to finish this piece and make it my own.... my precious so to speak. I had to repaint/finish all of the strapping and saddle and then repaint the howdah. I pretty much stuck to all Games Workshop colors except for the Iron Wind Metals paints I use. Below, you can see the howdah's on both Mumakil. I think they match up fine, but it took a lot of thin layering of my scab red as it was in bad shape and I had to really dilute/thin it to bring it back to life... always thin your paints! You'll hear that from a lot of painters, but it is an unspoken rule once you really get into painting. As a side note, one of the problems I really had to deal with was that the unarmored Mumak was really dusty.... I had to clean it before I could repaint it.... I used canned air and a damp brush with some dry paper towels.


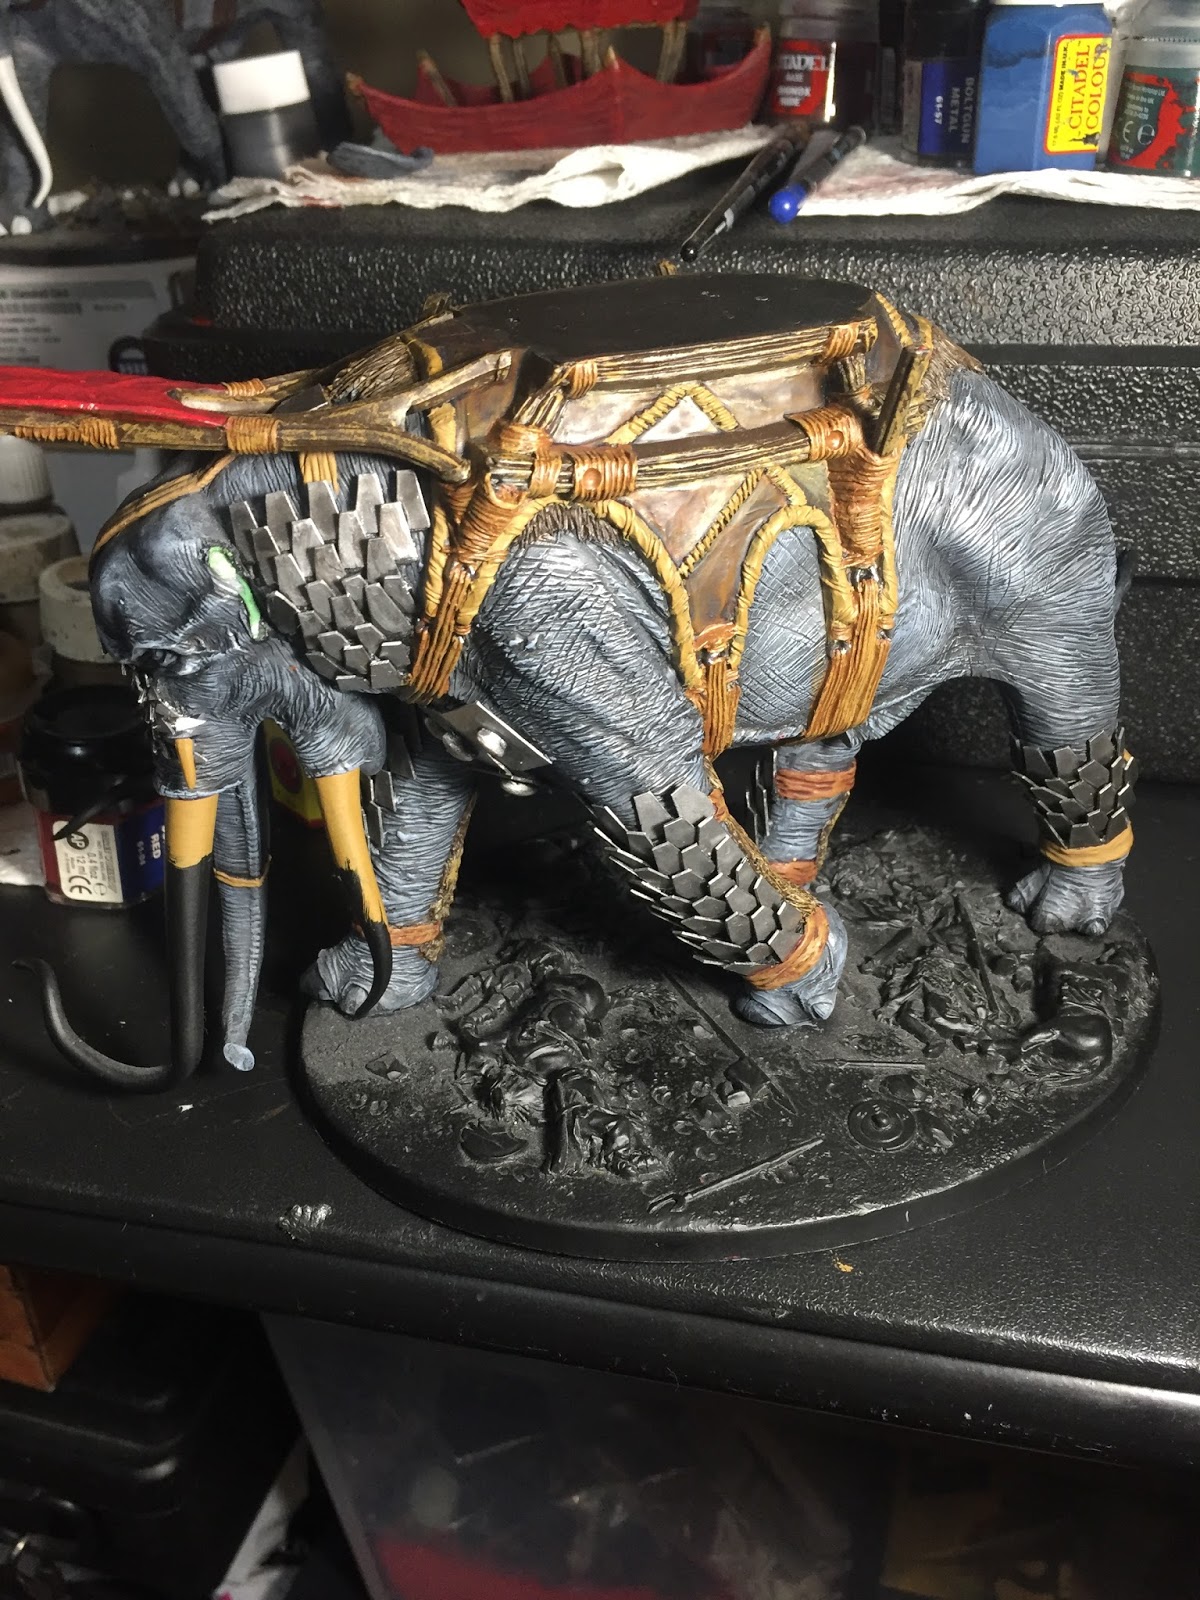
I wound up repainting the unarmored Mumak's howdah completely... and then had to paint the strapping and the iron loops. Originally, they were left brown like they were rope loops, the iron color broke up the plain coloring of the browns.


When it was done, the howdah, ropes and rings looked pretty nice.


 I worked on the unarmored Mumak while a lot of the work on the armored one dried. It required a complete repaint of the howdah... I did it section by section and am still finding myself going back to touch it up here and there. You can see in the lower picture that the armored Mumak is missing the lowest side parts to the howdah... this wasn't too challenging as I had to fill the holes for the attachment pegs... I did so once, but the material I used sunk in when dried... I should have known better and thought it would have looked ok after the repaint. I was mistaken... further down I decided to use an industrial version of "green stuff" and you will see that it worked pretty dang well.... as compared to how it looks in the pictures below. At this point I felt that they were really coming together.


 The unarmored one was looking much better as well. The howdah repaint looked much better and the dry brushing/shading on the wood made the two of them look like they were done by the same individual form the beginning. That is exactly what I was looking to do. I know I have a long way to go to be considered "good", but I am happy with the way my figures come out.... I don't slap paint on them, I take my time and try to make them look good, but on the other hand.... I don't spend weeks on the same figure to make it world class.... I would never get to play... and my play time is limited as it is!

 I think the model looks a lot better with the rings painted as metal loops and not rope loops... it adds another splash of color in an area already over "brown" and confusing to look at.

 
The end effect looks pretty good I think.... the unarmored Mumak still now needs the tusks and toenails repainted and shaded.... the bright white just doesn't work for me, especially on the toenails.... this beast walked from Far Harad to get to Western Middle Earth/Gondor.... I don't think the toenails would be that white... I will blend in the white with a light tan and GW bleached bone for shading on both the nails and the tusks...


Above You can see where I left off last night.... the series of photos above were taken over several sessions... my paint time is limited, so I am trying to get into the habit of at least taking some pictures during the work process so there isn't just a beginning and end photo.... I like progress pictures. Yesterday saw a lot of touch ups and some modeling. I glued the left ear back on and had to create from scratch a piece of timber that supported the front left of the howdah. I think the model was dropped at some point as all of the "repair" work was the left ear, missing left front flag and missing left front howdah support.... Above you can barely see the putty work on filling the holes for the lower howdah parts the second time.... again, I am sure that they were broken in whatever tragedy did the other damage. Anyway, I made a piece of timber and textured it to look like the others, once painted, I am sure folks won't even notice it.

At this point, aside from some touch ups on the unarmored one and the tusk and toenail repaint, it will be ready for the matt varnish by this weekend!!!! The armored one will require more touch ups, painting of the support, tusks and toenails.... then move on to the base.

I'll take a final photo shoot when both are completed and make it a separate post. These beasties have come really far and have been a lot of fun. if I could change anything about my work, it would be to rethink the "hair" patches on the armored one... at first glance, the hair on the Mumak all looks like it is actually animal furs/hides put on to stop the armor and howdah form chaffing the Mumak.... but, then there is this "hair" that was added to the back of the legs.... I treated it like animal hides, but I am thinking it is all supposed to be Mumak hair.... so the browns wouldn't really work for hair.... they work right now, I am ok with them being treated as "animal hides".... but I might have changed that thought sooner had I looked at the model closer before painting and shading them as brown hides....
     

Tuesday, May 1, 2018

More Knights of Minas Tirith

Ok, so I know a lot of folks are looking for more historic figures and games... and I am sure it probably looks like all I do is Lord of the Rings.... I promise to get more/different pictures up soon enough. When I am done with the Knights of Minas Tirith, I will be moving on to some SAGA Crescent & Cross 4 point Milites Christi Warband. More on that later.


So far, I have gotten the Knights' bases scraped and re-flocked in gravel and now repainted. I have decided to repaint the Knights one at a time. You can see one of my original knight next to one that is almost complete in the lower picture


I had a hard time "muting" down the bright shiny silver used to paint the knights.... You can see in the lower picture that I managed to dull the armor down to my desired color using a blend of GW black and IWM Steel. I thinned the paints down as I didn't want to have to strip the figures and I also didn't want to lose any details... the end result worked, but it took a little time.


One of the changes I decided to do was to go back and make my original Knight's lances black... this will match the new knights and help blend them to appear to have come form the same artist. It also stepped up their appearance as "Knights".


One thing I had to deal with though is the different painting styles here. My horses were originally all painted darker brown, while the new ones are all lighter "dun" in color, Khaki even. The same can be said for the unit's entire paint pallet. I had to go in and change each item to match closer to my original paint jobs... the swords had to go from bright "GW Blazing gold" to a more muted bronze/gold. Even the tack and harness had to be darkened.... I chose to keep the lighter horse color though to add in some variety. I also plan to go in and add socks to some horses of each color.

They came out fairly decent enough in the end. I absolutely love IWM Silver and Steel!


I have to admit though, I used a lot more static grass and tufts on these five than I did on the original ones. It wasn't until I was done that I realized... I hadn't repainted the tack and harnesses black like the others.... some folks would leave it as that distinguishes a second "unit", but I wanted them all looking the same, so I opened up the paint and went about making them all uniform.


A lot more static grass and tufts from Army Painter.
It didn't take long and I am glad I noticed before I had sealed them in matt varnish!


All together they look like a nice solid unit!
Sealing the knights & priming a dino for Ghost Archipelago.

I am glad that I made them all match as together, they look like a very nice unit! Just think... only six more to go... the plastics..... all with pennants and shields. I think however, that I will take a break from them though and work on a Mumakil.. I found one in the flea market at HMGS Historicon 2017.

It was in rough shape and was missing the lower parts to the Howdah, but it was very nicely customized with armor plating..... More importantly, the price was right. I will work with some green stuff to cover the lower Howdah attachment holes and I will also change the color from steel grey to the more visible red fabric. I am thinking I need to add some tusk weapons too! We shall see.... It will be a project to say the least.


It was rather dusty from being in storage, but nothing I couldn't work with. Since it will require a lot of work, I opted to start with the top of the Howdah and will do it section by section and then work my way down to the elephant. The elephant body and plasti-card armor was very nicely done... the harness and ropes will all have to be repainted as they were only very "roughly" painted/base coated.

 
A lot of customization went into this beastie and I plan to do it justice and get it finished up nicely! You can see the unfinished model above and a great view of the armor that was added... it has a LOT of potential and yes, I have the ear. When I am done, it will match my other Mumakil and my painting/modeling style.