Search This Blog

Thursday, March 7, 2019

Some Mordheim reworked Reiklanders

In an earlier post I talked about a great deal I got on a Games Workshop miniature case that I desperately needed for more LOTR figgures... It came full of troops... most I didn't need or want and they all made it to and got sold at one of the HMGS conventions flea market sessions.


Well, some of the figures that I held on to were a batch of what appeared to be a Mordheim Reiklander warband. It was made from one of the newer Empire Militia box sets and other bits. It was not completely painted and, was pretty sloppy. I liked the look that the original owner was trying to achieve. The warband had seen some action for sure, so they were played and loved and like all things you buy second hand... they were now someone's broken dreams come to be made anew. As I already have well over 200 Mordheim figures as it is, I knew these would not be mine for the keeping. I would rework them and sell them.  


I could tell that these were painted with predominantly all GW paints. The colors were right. I had a lot of straightening to do with lines and over-paint. I even found areas that lacked paint completely on the finished models. I was surprised that the figures were just painted and never primed! This was evident by the partially painted great swordsman and the unpainted bits I saw in the recesses on the other models. One thing I at least give the original painter a lot of credit for was that he/she at least tried to and painted the figures eyes.... This isn't something I take lightly... I suck and very rarely paint eyes. I need to go to an HMGS class at Hobby U and learn how to do this.. it is on my bucket list.


The first thing I did was go through and base coat all of the flesh on the figures, this cleaned up the edges and got rid of the horrible over-paint on the eyes. I then straightened all of the lines. This was mostly where the red and white lined up. I tried to use the same paints I thought the original artist used. Once everything was blocked out again, I went in and just made the paint smoother. It wasn't chunky, it was just thin in some places and just didn't look right. The white took many coats to clean up. The over-paint on everything was fairly straight forward. I went in and just made stuff look right, using the same colors as were originally used. I also used the IWM steel to go back and repaint a bit of the armor and weapons.... the GW shining silver is a highlight paint to me, not a base coat.... I really hate very shiny metal!


I went on to add in some highlights and never really came to terms with repainting the feathers other than white. I had a lot of ideas, but opted to let the new owner choose their own colors. I cleaned up the plumage and painted them white. One of the hardest things about doing repaints... IF you don't choose to strip the models.... is making sure you don't get buildup and a loss of detail. I was very careful and kept using very thin coats to get the clean up work done. The end result was fairly nice.


The last thing that was done was to rework the bases. I added in more flock and gravel, some grass tufts to bring them all together and then repainted the base edges and exposed top parts. The group now looks like a unit and is ready for the flea market at a good price!


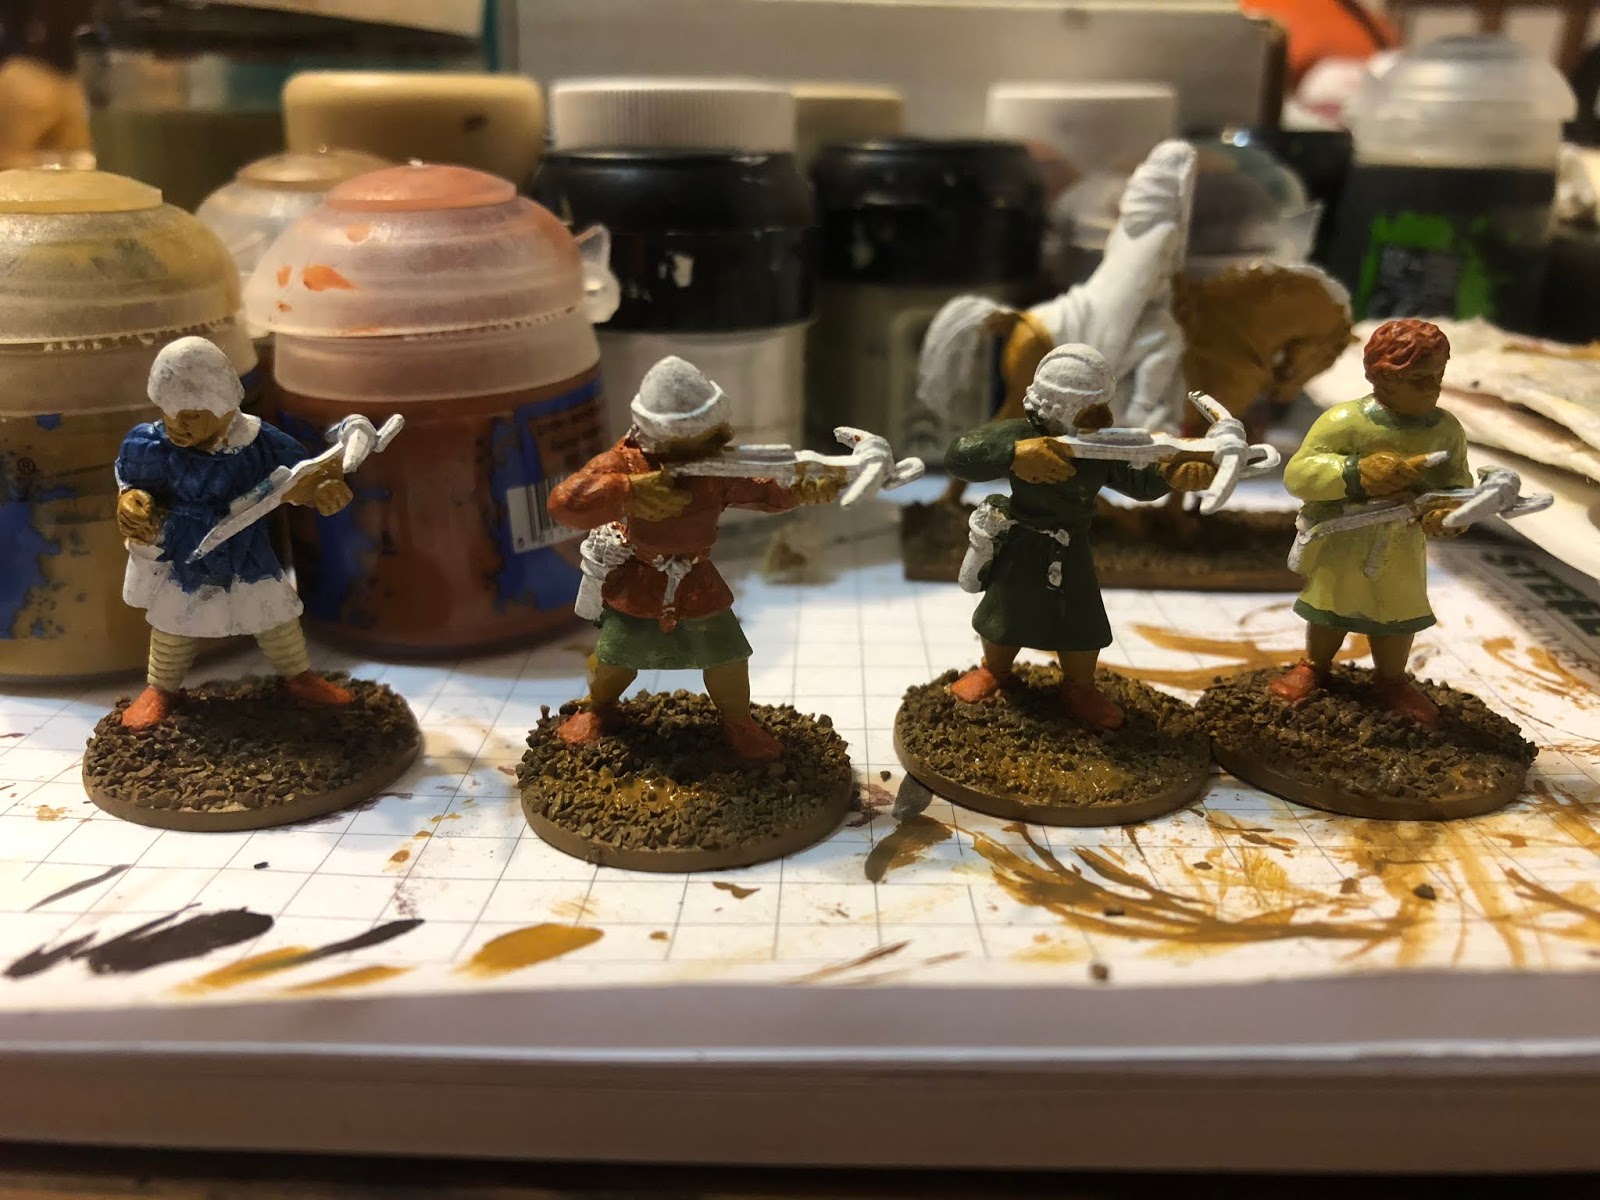
I added in the last photo as a lead in to my next post and a bit of logic as to why I wound up getting these guys reworked finally. With HMGS Cold Wars 19 around the corner, I found myself lacking in a lot to sell in the flea market... AND... I believe that we are playing our regular Mordheim league at the show.... The two crossbow men are part of a henchmen group for my Reiklander warband and the guys have been giving me a lot of crap about having one that was unpainted.... So, I had to get him painted before the show and possible game.... along with the humiliation and teasing that would ensue if I showed up and he still wasn't painted yet. The guy I had to paint is the one in front... I pulled the other out so I could match them up.... The one in back was painted over 10 years ago. If you look closely, you can in the  back left of the picture a part of what will be my new Reiklander captain.... he is an Empire hero and I bought him in "finecast"..... I hate that stuff, but I couldn't find the white metal version of him.

The six dwarfs on the right, well.. more Lord of the Rings Strategy battle stuff. These are the metal ones I picked up in a flea market deal at HMGS Historicon 18. There are 6 of them.. archers that is.... I am wondering why I took the picture of 5 archers and the ranger dwarf I was using as a template....??? All six are painted and I am working on Dwarf rangers now... I know I posted them all to FB and such.... I wonder where that 6th guy was when I took that pic. 


Flames of War Soviet Tank wrap up

Ok, so it seems I don't post enough still.... Mind you, there are gaps where nothing gets done as family and other interests often push my painting aside. Pathetic.. I know. Life has a way of doing this to all of us I am sure. I often yearn for the carefree days where I had the time to do what I wanted... BUT.. I never had the money....


Anyway, as usual, I enjoy every second behind the brush. I would call these done except I want to add decals to them! I believe they are all FoW battlefront miniatures.... all are plastic except the early war T-34 in the front, it is an early make, resin and white metal.


I actually did these as a "quick paint". I wanted to see how the Army painter aerosol worked out of the can. All of the tanks were base-coated in Army Painter Soviet Green or Soviet Armor... I forget what they are calling now a days. The 4 plastic T-34's went together very well. As a model kit, I would have to say they were very nice. They are extremely light and will make for easy transportation. One thing I suggest doing though is to add in a few small washers for weight. This isn't to give them a heavier feel, it is to help with using them on the battlefield.... they are so light, they slide down hill slopes, etc... without adding some weight to give their treads some grip.


As I have said before, Battlefront was late to the game, but they brought their "A" game for sure.... the plastic is durable, easy to work with and most importantly, Battlefront jumped on the bandwagon with providing extra bits and turrets... this means you have to buy fewer tanks as you can now use them as T-34 early and late by swapping out the turret. Had they not gone that route, folks were buying Plastic Soldier Company and other brands. In the end, for me, the Battle front products won out as they are uniform and fit well with their white metal and resin kits.


So, for these tanks, I base coated with the Army painter green. I didn't highlight them like I have done for others, it is simply a test to see how they would work with minimal paint and time. I picked out details with a combination of Iron Wind Metals, and GW paints.... I absolutely LOVE the IWM Steel.... it has never let me down! I used it for the treads, saw blades and anything else that was bare metal. For the exposed tankers, I did not use my go to Vallejo colors. I used a blend of IWM flesh, leather and tan. The helmet is GW black with some Eshin grey to pick out the details...


The most important detail you can give vehicles is weathering. I am no pro by far... I have played with the inks and rust and even taping to get the "chipped paint" effect. In the end, at 15mm... table top eyeshot... I think the best is to give some texture, for this, I use the Tamiya paint sticks... they work great for snow, wet mud, dry mud, etc... AND, best of all, they are thick, they go on like a crayon almost and then you can feather the edges or blend in other shades to get the effect you are looking for. I mainly use 3 colors... bark brown, tan and white... for adding snow and mud effects to bases, boots and vehicles


Here are the tanks after a quick matt varnish. They appear a little too shiny for my likes, but they will do. I might go back and add some highlights and decals. I also tried using some GW Nuln oil on the SU 85's. I did not like the shiny effect it gave to the flat paint. Once the tanks were matt varnished, it helped a little, but you can still see some sloppiness that I didn't go in a fix.


Below are the two plastic T-34's with the crew exposed. I opted to go with the tan uniforms instead of the black ones... the black would look cool, but that is how most of the German tankers look.. I wanted my Soviet tankers to stand out a bit better, but still match the coloring.


In the end, it was a fun little project once I got going on it. Total time invested was actually minimal, even though it was dragged out over a long period of time. This now brings my total of completed T-34's to around 75 I think.... I know, I know... what the hell was I thinking! Maybe I'll have a run at Kursk before I sell some of them off. Like all games, I get in waaaay over my head and I never seem to break the surface again.... My issue here was that originally I only planned on doing an infantry army for the Soviets to do Stalingrad.... well, the way the model kits were released, I wound up buying and trying them all out and wound up with a lot of tanks in the end...


Flames of War is still one of my favorite games, but I must admit, I haven't played in a few years... the constant rule changing was a huge turn off. I heard they went back to the basics again in their latest rules release.... I might have to check it out. I keep asking myself... do I opt to just rebase my infantry and use them all for 15mm Bolt Action? I just don't know. I have soooo much FoW stuff based and ready to go. I just need them to hit the table top.


Tuesday, November 27, 2018

Even more Dwarves for LotR skirmish battles!

I can see that I will be working on dwarves for a while.... my Milite Christie are on the back burner... so much for my attention span or lack thereof....


I also pulled out some Soviet 15mm tanks for FoW.. some on that in the end of this post.


Ok, so in various pictures on the web and in other blogs, there has been this outstanding, unpainted "dwarf king" figure that has been lingering in a lot of photos, but never seems to get painted... well... I finally painted him! More on that later....


As I am finding, I still have about 20 or so more dwarves to paint, both heroes and rank and file troops. I mentioned elsewhere that I am going to see this through.... I need to "complete" this force. Well, this and the goblins.... I have about a dozen or so of them left to paint too!


Each painted figure however, brings me closer to this goal... my time is short due to family and such, but I am finding more time to paint.... instead of video games.


  Just a recap... above is the last group I managed to finish over the Holiday weekend. 2 plastic dwarf warriors, a vault warden team (plastic) and my first ever lead dwarves from the GW LotR line. They were a blast to paint!


Moving on...


Painted in the same style as the others.. more Blue Mountain dwarves! It just dawned upon me that I do not have any finished pics of this batch of three... these are both "works in progress" pictures. Again, I need to comment... as much as I do like them, the GW plastic dwarves are just lacking in details. They blend together and in some places just disappear all together so you are not sure if you are painting armor or tunic!


After these three were done, I moved on to a new batch. One of the lead dwarf kings and another lead model I like the pose of. One thing for sure is that the sculptors for GW have come up with a lot of really good poses for the figures, especially the lead ones. Included in this group was the dwarf ballista & crew and three plastic warrior archers. ALL of these figures, like the earlier ones I have recently posted about came in a great flea market find at one of the HMGS shows!
 

Not sure why the pictures uploaded in this order, but I am not one to try and rearrange them! Up first is the metal dwarf warrior. I have long toyed with the idea of having an "allied' dwarf force just create another paint scheme. I have finally come up with that scheme. The dwarf king and this figure below were the first to try out the new colors. I went with ITW steel, bronze, flesh and light grey, while the rest were GW paints... bleached bone then a couple of browns and greens.... I would love to remember the names, but they change so frequently I don't remember them! The warrior photos are a little out of focus, but I like the color scheme. The Nuln oil went on a little dark, so I had to go in and lighten it up with some dry-brushing. I believe that color used to be called goblin green.


I was much happier with the dwarven king paint and photos. The grey on the back that looks like it is stuck to his cloak actually is not. It is just a higher bit of flocking. They were both actually quick paint jobs and went fairly smoothly. They are better than "table top" quality, but still a far cry from collectors quality.


I wasn't sure which pictures were better, so I included both sets. I am actually pretty happy with how they turned out. The hard part now is to sit down with the rules and see how many models it is going to take to make a smallish warband under the new rules and then to paint enough dwarves in this color scheme to match up. One thing that crosse dmy mind many times while painting these dwarves was that I see a lot of folks painting the axe hafts "wooden". From what I could tell, all of these weapons were completely made of iron or steel.... gilded even. Evidence of this is in their "square" hafts, not round like wooden poles or hafts would be.... In the end, I opted to remain consistent... all of my dwarves would be hitting the table top with matching metal weapons!


 Below are the beginnings of the next batch... I need to step away and decide how they need to be painted before I continue with the dwarven warrior archers. The new points system doesn't seem to be that much different than the old one for warriors, so I should be able to come up with warband points costs pretty quickly. Then I can move on to painting them the correct colors. One thing for certain though is that the ballista crew would be painted the blue of the Blue Mountain dwarves! This was a no brainer. I did however struggle for a moment or two with thinking of the new color scheme as the colors for the dwarven "engineering" guild... and I would have all siege and heavy weapons painted in the green and bleached bone color scheme. It was a passing thought....


I decided to pain the ballista first as it really would be a no brainer... I got carried away with the drybrushing and am considering going back and repainting it.... It is far form done though. The Nuln oil will help mute the highlights and also bring out more details, like the banded rope in the winding/firing mechanism. I also need to go back and clean up the sloppy drybrush work. Some of the brown found its way onto the steel colors.


Below you can see the ballista flocked.  this is actually done with a smaller grade GW flock. Same material, just a different sized diameter.


Below are the beginnings of the troops.... I got basing material down and base coated in the Eshin grey... at least I remembered that name! I'll be adding a group shot of the new household and these figures once they get finished up.


Below is the infamous model railroad gravel flock I have been using for these figures... hindsight is always 20/20... had I been thinking clearer way back when I started these models... I would have gone with a finer grade flock. I have 2 smaller grits I use. I usually use them for heroes or smaller models like Flames of War. This larger type might be all I had access to 8 or so years ago. heck, when I started painting the LOTR figures I used what they had in the books... and back then it was the God awful green dyed saw dust... My original fellowship is still based with it... needless to say... basing technology has come a loooong way since 2000!


Lastly.... just to break up the monotony, I finally found some more "Soviet armor" green at our local brick and mortar.... "The Griffon's Lair"... Now located at their new location on West 26th street in Erie PA.... funny how that happens.... Tim, who owns Gateway Games just moved to West 26th street also! the shops are about 10 block away form each other now. Both are great stores in their own right, catering to different gamers... The griffon's Layer however seems to be a dedicated "gaming" store that does their mainstay in miniatures.


These models have been sitting around, built, but unprimed or base coated for over a year!! I am pretty sure that they are all Battlefront kits. I do own a lot of Plastic Soldier company plastic kits too. So, in between dwarves I'll be knocking out 2 SU 85's or 100's... not sure by looking at the barrel in the photo and 5 more T-34's to bring my field-able total to about 75! (I know.... they are just addicting to build).... There is actually a story behind why I wound up with so many.... I was buying all Battlefront kits, but then the Plastic Soldier Company came out with plastic box sets that were extremely cheap and worth it casting wise.... also, PSC came out with T-34's with 2 turrets!!! now, you could build a T-34 and use it for early or late war!!! How cool was that....? Battlefront caught on quickly... they then started releasing plastic and resin mix kits and even all plastics... their T-34's now came with both early and late war turrets and their other models came with multi-kits where you could build either-or of the model types enclosed... Anyway... as I am a whore when it comes to buying and using models from the company that actually created the rules.... when Battlefront finally went to plastic multi-turret kits.. I had already built like 20 PSC ones.... then I proceeded to buy Battlefront ones with the intention of selling off the PSC ones.... something I just haven't gotten to as of yet...


Tuesday, November 20, 2018

Dwarves for LotR skirmish game!

With the re-invention of the Games Workshop Lord of the Rings skirmish game, I jumped back on the horse and picked up working on my armies.... I have so many of them now!


Currently, I am working on finishing every Dwarf and Goblin model I have.... at least until they come out with new ones! I have approximately 100 or so Goblins painted and about 10-15 more to go. They were easy to obtain as most folks did not want them and so many Fellowship starter boxes found their Goblins up for sale, trade or even free.... I took advantage of that!


As for Dwarves... I waded into that army slowly... I started with all plastics.... 12 warriors and 12 rangers (my friend and I split the boxes of 24) with an assortment of lead heroes and command. Over time, the force grew to match my Goblins. I now have about 80 or so dwarves, including standards heroes, etc.... but not including any of my Gimli's... that would probably add another 10 or so figures!


 So, it had been a while since I painted any Dwarves for LotR Skirmish battles and so I had to pull out one of the warriors so I could match the colors. One thing I noticed right away is that all of my already painted dwarves had their base rings in a medium grey color.... a paint I no longer have. I had to go and repaint all of my existing dwarves in Eshin grey, a darker grey for the base rings.


Another issue was that the blue I used.. Ultramarine blue I believe was also gone.... I opted to use Cygnar blue and found it a bit too shiny. in the above picture you can see how it looks. It was at this point I went back and took the chance on Nuln Oil as a friend or three suggested it when I posted on FB. I also tried to blend some white with the Cygnar blue to flatten the shine and that seemed to work also. Below is the same figure hit with GW Nuln Oil... this was my first attempt and I am thinking on going back and repainting the highlighted areas brighter as it is too dark in some areas. I also experienced this with some of my Milite Christi crossbow men... I was sold on using the Nuln oil when I saw how cool it's effects were! I just need to practice and get better at using it.


As for Dwarves... recently I picked up a great amount for a great price in the flea market at one of the HMGS shows... I even got a dwarven ballista and crew! Originally, I had only bought plastics and a few lead command figures. I never bought the original pre-plastic lead packs that came out... because of this deal, I now have plenty of the lead dwarves to paint and a bunch more plastics.
 

Here are the first three lead ones I did.. they are all from the same pack. The detail is so much better than the later plastic kits. Below are close up shots of each of them.


 After having painted them, I moved on to a second group... a dwarven king, a vault warden team and a couple of plastic warriors. I am still undecided on the paint scheme for the king and he will be addressed in another post. I plan to use him as a captain from another household... which means I will be painting a warband in his household colors to match.. once I decide upon which to use.


Above is the group (sans the king) completed and below is the group in close up shots. The main colors for my dwarven army is blue, bronze and then, of course.. the other necessary colors for leather and armor... a mix of ITW, GW and Army Painter paints. I used the larger GW gravel as the theme for the army is Blue Mountain dwarves, come to reclaim Moria in the era of Balin. Obviously, they can be used "as is" with any hero, but the main theme is Blue Mountain Dwarves from Thorin's time and then just after as Balin went to reclaim Moria from the orcs and Goblins that dwell there.


 One of the things I should mention better... the plastic warriors and rangers box sets.... a LOT of detail is lost in the molds or the sculpts were poorly done. I am not sure which yet, but there are a few ambiguous places where details blend together and it is hard to discern whether it is armor plate or leather or even cloth....


As I mentioned, I painted these figures, then used Eshin grey to go back and paint the base rings. I need to touch some of them up before I mat varnish them! I think they came out decent enough. I have more to paint just like them and by the time I get to them, I will know better how to ink and use the Nuln oil. In all honesty... I have achieved all of my effects to date by drybrushing and building up layers... the Nuln oil, when done right, goes right into the recesses and creates shadows ad a very nice look. This, coupled with some dry brushed highlights should greatly improve my painting appearances!


Here are the first three again. All were coated in Nuln oil for shadows and recess shading. I think all of them need touched up to brighten areas where Nuln oil was left NOT on highlighted areas.


Currently, I am working on another batch of dwarves. I'll post about those in another update. In the mean time, I might have to pull out the whole army and post a few pics of both it and the Goblins. I know I have been talking a lot about GW's Nuln oil.. but I am finding it pretty damn cool and it really does break up the model's surfaces, shadows and highlights.... it makes crisper lines and draws the eyes around the model.

Quick follow up on the SAGA crossbowmen

Instead of editing the last update, I thought I would just put up another quick post about the SAGA Milite Christi crossbow men.


Per my usual MO... I finished them to match what I had already done, after all... who doesn't like a consistent army? And, the bases really tie a force together!


Here they are in all of their glory.. the last 4 crossbow men for the Milite Christi SAGA war band! I really changed up how I painted them and like the effects. I also used some GW ink and Nuln Oil to highlight, shadow, etc.... I am still learning to use inks and the oil, so I made a few mistakes... nothing I can't live with though.  I REALLY like using the Nuln Oil..... I will learn to use it better and the figures I paint will become that much better for it!


Here they all are as a unit. If you zoom in to the guy in red, you can see the Nuln oil wasn't washed away quick enough and it dried a dirty red color.... I am undecided if I like this and might go back and repaint the areas that should be clean and crisp.


 I also got the knight's horsed primed and based... well, based as I primed them a while ago.


And here sits everything I have left to do for the Milite Christi warband! I have to finish the commander and the mounted knights. All are ready for paint. Once these get done, I will then put the decals on and then seal them all. As I mentioned in my last post about the decals.... it rather bothers me that they are sold in packs of 12 and the box set and packs need either 8 or 16.... it is the whole hot dog bun vs hot dogs in a pack thing.. why don't they match up number wise?


The next post you see about the Milite Christi will be a work in progress on the knights and possibly their completion in one post.. I hope! Then it will most likely be on to my Norman SAGA warband! They will double as a crusader war band too!

Wednesday, November 14, 2018

Some work on SAGA Milite Christie Warband

This project has taken way longer than I anticipated. I absolutely loathe painting black and white together.... I thought it would be nice, but optically... it drives me nuts.


To recap....
Some of my historic friends recently got into a skirmish game called SAGA.... I told them I would give it a go.... this was almost 8 months ago. Needless to say, SAGA is actually a pretty decent game. It is a skirmish game that uses it's own unique dice and those dice drive something called the "ability" board. I won't get into explaining the rules other than to say.. I have not played an official game yet, but I have gone over the rules many times. It is a unique game and I hope it will play as fun as it seems.


I bought the Milites Christi faction.. which belongs to the "Crusades" version of the game.... Currently there are a few setting to buy, build and play your forces.... Viking era, Crusades era, Age of Arthur and now a fantasy one too (just recently released). I do not think the warbands over lap at all, but... the Christi faction can be used as Normans as they are composed of pretty much the same forces.
 
 
I have been working on these on and off for some time.... I have loads of other projects I can post about and need to! As I mentioned, I do not like paining against white.....

I bought a SAGA 4 point army starter box. It has a general, 8 mounted knights, 8 warriors on foot and 8 crossbow men. The models are all lead with plastic bases. I like the flat round ones as they do not detract form the models when they are finished.

The models were easy to assemble. As for flashing, that varied.... most were cast very well, but there were a few that had a lot of mold line issues and flash to clean up. I glued them together once cleaned up and then primed white. I wanted my white, when I painted it to be bright enough.... I hate how hard it is to sometimes paint a light color on top of a dark primer.

The figures were then based in the small Games Workshop gravel... this paints up nicely as rubble or rough ground. It all depends if you add grass or other scenic material. I was going for the appearance of rough ground. Not quite sand and not quite lush land.... more of a badlands look in an arid climate. I chose 2 GW tan colors. They used to be called different leathers... now the one has a number for a name and I forget the other... we shall say tan and desert tan as the highlight.  


The color pallets for the warriors was rather simple... black, white, dark brown for the jerkin color with a lighter brown highlight. The armor was of course IWM steel. Any gold type accents were actually painted IWM bronze. The flesh color was a mix of a light tan base as I figured these guys were in the desert for a while with some IWM flesh as a highlight. I still am not painting eyes...


I used a lot of drybrushing  for highlights and no real shadow painting as I relied on the base color to create the shadows. Also, as you can see.. I started with painting the warriors on foot.


Above you can see the colors I used for painting them.


Here they are almost done... they still need sealed and the bases need their final touches (grass and highlights)


After the warriors were near completion, I moved to the crossbow men.. I thought these guys were going to go quicker as they were more fun to paint, but out of the gate, the royal blue for the gambeson was giving me issues. I actually started with him and then finished him last form the first group of 4. As these guys were not peasants or levy, but professional soldier... not knights, but professionals... I wanted them to have a varied look, but not simple peasant garb.


 Here they are in progress... I used a variety of Vallejo paints as I wanted the clothes to be brighter and a little more "middle class" in appearance.

 
Lastly, I tackled the blue gambeson guy... with some work, it turned out pretty decent. It was hard to choose the right colors to make it work. That is the last time I try to "emulate" what is on the box art! In the end, I think the four of them turned out rather nice. The colors I used were almost all Vallejo. Below you can see them almost finished, grass tufts included... after I took this picture, I went back and cleaned up some of the painting... It is amazing what you miss and what gets revealed in a picture!!! 
 

After this group was done, I took a little break and worked on some LotR dwarves.... yes, more on that later.


Above you can see the 8 warriors and 4 of the crossbow men. All done except shield bosses and sealing. I pretty quickly moved back to finishing up the last 4 crossbow men... I didn't think it was much of an issue, but the unit consisted of 8 guys... 2 of each pose... this is easily remedied by painting them different... as they are rank and file, it really wasn't a bother.. BUT.... if I had to paint too many of the same pose, my enthusiasm would have run dry.... such is the life of a rank and file trooper!

 
This time around, I opted to do the gambeson in leather... at least that is something I can do well and really enjoy... leathers and steel armor.... I think the pallet I chose turned out very well... enough grey to break up the continuous browns and that leads the eye to the shaded and highlighted gambeson. Mostly GW and IWM paints.


The last 3 crossbow men are in que to get done and are further along the picture indicates. I'll do a follow up of them all done when I start posting about the 8 mounted knights.


At Fall In! I managed to get the shield bosses and my next project...  I'll be adding these when I am ready. the only bad thing is this... the packs are relatively cheap... ~$5... BUT.... you only get 12 decals per pack.... the starter army alone needs 16.... I didn't know this until I got home. The thing is... They are DESIGNED to fit Gripping Beast Miniatures.... you would think that they would know each box set requires 16 decals.... lesson learned. I'll have to pick more up later.


Milites Christi decals
 
 
 My new project for when I get the Milite Christi warband done. This warband will go faster than the Milites... lots of armor and leather!